1. BELT TENSIONERS
Most late-model engines have serpentine belt drives for the engine-driven accessories. And most people know that belts are a maintenance item and eventually have to be replaced. But many don’t know the spring-loaded automatic tensioner that keeps a serpentine belt tight is also a wear item. Consequently, the automatic tensioner may also have to be replaced when the time comes to change the belt.
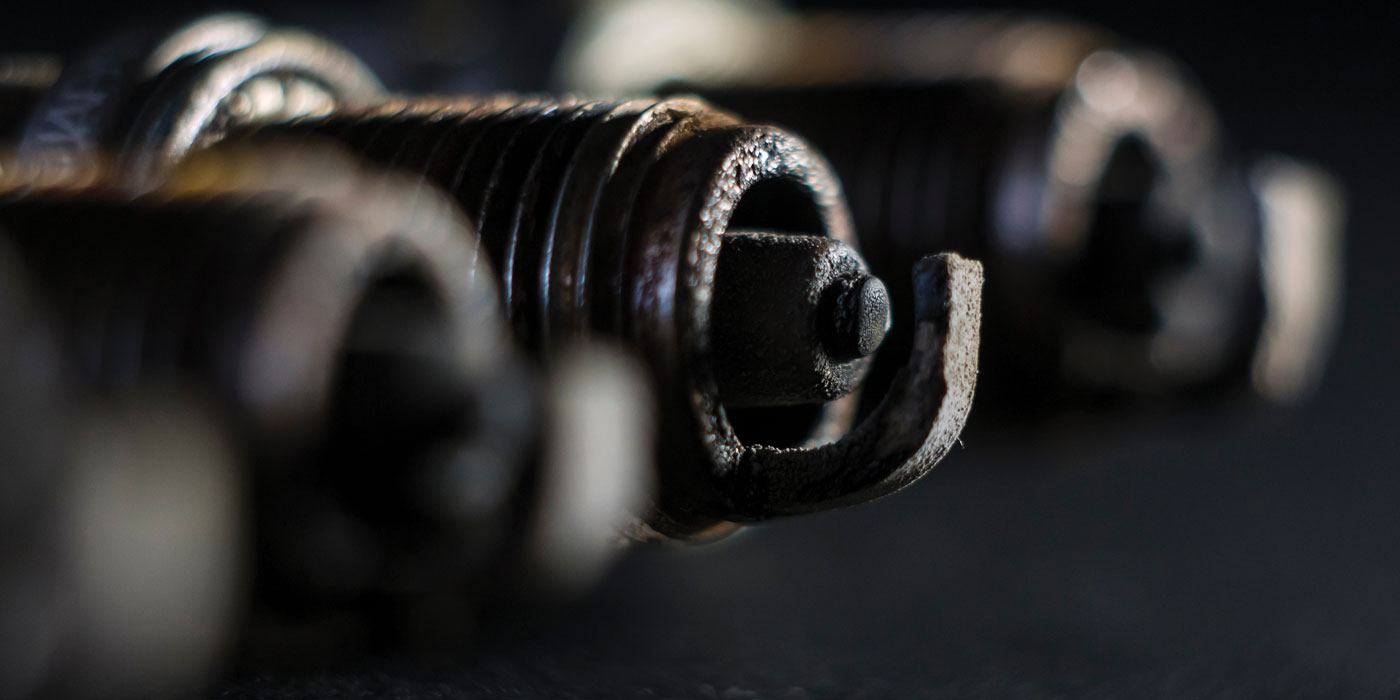
The automatic tensioner has a coil spring inside that applies just the right amount of force against the belt to keep it tight. The tensioner also provides a little “give” so it can absorb and cushion shock loads on the belt that occur when the A/C compressor clutch cycles on and off. What’s more, the tensioner automatically compensates for wear and keeps the belt under constant tension.
But nothing lasts forever, not belts and not automatic tensioners. The typical service life of a serpentine belt is about 60,000 miles or five years. When the belt nears the end of its life, it may become cracked, glazed and noisy.
If an aging belt is not replaced, it may break, causing a loss of drive torque to all of the engine’s accessories. When the water pump stops turning, the flow of coolant stops and the engine begins to overheat. When the alternator stops turning, there is no charging output and the battery starts to run down. When the power steering pump stops turning, the steering suddenly gets very stiff and hard to control.
All too often, an old serpentine belt (or a broken belt) will be replaced with a new one. But the automatic tensioner is not inspected to make sure it is still working properly and is in good condition. This mistake can lead to rapid belt wear and repeat belt failures if the tensioner is weak or worn out.
Belt tension is critical. Too little tension may allow the belt to slip and squeal. Slippage also causes the belt to run hot and age prematurely. And if the belt is really loose, it may come off its pulleys. Too much tension on a belt may overload it as well as the shaft bearings on the water pump, alternator, power steering pump and air conditioning compressor, possibly leading to premature failures in these components.
Belt tensioners were first used back in the late 1970s. These early units were fixed tensioners that required manual adjustment. Then automatic belt tensioners arrived in the mid-1980s. The spring-loaded design eliminated the need for manual adjustments and assured proper belt tension for the life of the belt. Because of this, the tensioner is often overlooked when a belt is replaced. Even so, the tensioner should always be inspected when changing a belt because:
• Rust or corrosion can jam the tensioner housing and prevent it from rotating freely. A frozen tensioner cannot maintain proper belt tension. Corrosion is usually a result of road splash, especially in areas where roads are heavily salted during the winter.
• Dirt or mud can also jam the tensioner housing.
• A loose or worn pivot arm can allow unwanted movement that results in belt noise and misalignment. Over time, this will increase belt wear and lead to premature belt failure.
• A worn bushing in the tensioner pulley can cause vibrations and noise. If the bushing seizes, it may cause the belt to snap.
• A weak or broken spring inside the tensioner can’t maintain proper tension and the belt will slip. Springs lose tension over time from exposure to heat.
• Cracks or damage to the tensioner housing or pulley arm may prevent it from rotating smoothly and maintaining proper belt tension.
SYMPTOMS
Symptoms that typically indicate an automatic tensioner has reached the end of the road include:
• Belt slipping (due to loss of tension).
• Belt glazing (caused by slipping).
• Excessive movement or rocking of the tensioner pulley or “belt flutter” when the engine is running. This means the spring inside the tensioner is weak and/or the bushing is worn. The tensioner needs to be replaced.
• Wobble in the tensioner pulley (or idler pulley). Wobble means the bearings are shot.
• Belt or tensioner noise. The tensioner should be quiet when the engine is running. Any squealing, rumbling, growling or chirping noises should be investigated to determine the cause. A mechanic’s stethoscope can be used to pinpoint the source of the noise. The probe should be placed against the bolt in the center of the tensioner pulley wheel to listen for bearing noise. The idler pulley(s) should also be checked because the bearings in this component can wear out, too. The same goes for all the engine-driven accessories (water pump, alternator, PS pump and A/C compressor).
• Pulley damage. Physical damage of any kind on the automatic tensioner pulley may indicate excessive tension or physical interference. If the pulley is damaged, replace the tensioner assembly not just the pulley. If an idler pulley is damaged, inspect the tensioner also because vibrations caused by a bad idler pulley may damage the tensioner.
TENSIONER CHECKS
Check the movement of the tensioner arm with the engine off. Use a socket with a long handle ratchet or breaker bar on the tensioner pulley center bolt to rotate the tensioner. There are no specifications for measuring the amount of resistance offered by the tensioner spring, but if the tensioner offers little resistance it may indicate a weak or broken spring. If it fails to move at all, the tensioner is jammed and needs to be replaced.
Watch for looseness in the arm when the tensioner is rotated. The arm should not wobble or twist. If it does, the tensioner bearings are worn and the unit needs to be replaced.
Also note the position of the arm on the automatic tensioner. Many units have marks on the housing that show the normal range in which the arm can pivot. If the position of the arm is outside these marks, it indicates a problem (the belt may be too long or too short, or the tensioner may be jammed).
Note the wear pattern on the tensioner and idler pulley(s). Misalignment and bearing wear can cause the belt to track off-center. This will cause the belt to wear quickly. The tensioner and idler pulley bearings can be checked by removing the belt and spinning the pulleys by hand. All pulleys should turn freely with no binding, roughness or wobble. Any binding, roughness or wobble means these parts are bad and need to be replaced.
Pulley alignment should also be checked to make sure there isn’t a mounting problem in the belt drive system. Pulley alignment can be checked by placing a straight edge against the pulleys, or with a special laser alignment tool designed for this purpose.
REPLACEMENT TIPS
If the automatic belt tensioner has failed (and the engine has a lot of miles on it), it’s probably a good idea to replace the idler pulley(s) at the same time. Why? Because the shaft bearings on all the pulleys will have the same amount of wear. If they are reaching the end of their service life, replacing them now will restore the pulleys to like-new condition and reduce the risk of a breakdown because of a belt or pulley failure.
Aftermarket automatic tensioners are often a better replacement choice than an original equipment tensioner, especially on older vehicle applications. Some OEM tensioners (Chrysler 3.0L, 3.3L and 3.8L, for example) were not very robust and have experienced a high failure rate over the years. Rather than simply copy these OEM tensioner designs with their inherent flaws, some aftermarket manufacturers have re-engineered their parts to overcome the weaknesses of the original design. As a result, some aftermarket replacement tensioners may not look exactly the same as the original. But there’s a reason for this — these parts have been redesigned to outperform and outlast the original parts they replace.
A special tool that may be needed when replacing a serpentine belt or automatic tensioner on a transverse-mounted engine in a front-wheel drive vehicle is a special serpentine belt removal tool. The tool has a long, flat extension handle that allows a socket to be placed on the tensioner bolt, so the tensioner in a tight engine compartment, can be easily rotated to relive pressure on the belt. Without this tool, the job is nearly impossible on some vehicles.
2. CABIN AIR FILTERS
They call it the “hidden filter” because many motorists don’t realize their vehicles have separate air filters for the passenger compartments. Cabin air filters first appeared back in the mid-1980s. The earliest applications were on Audi and other European makes. Today, about 80 percent of all new import and domestic vehicles have a cabin air filter — or a slot where one can be installed.
Cabin air filters are put there for the health of the vehicle’s occupants. The filter can trap pollen, dust, smoke and other pollutants that would otherwise enter the vehicle and possibly irritate the nose and lungs of the driver and passengers.
Most of these filters are highly efficient and have electrostatically charged fibers that do an excellent job of trapping even the smallest particles (down to 0.3 microns!). A human hair, by comparison, is about 40 to 70 microns across. Most cabin air filters will stop 100 percent of all particles that are 3 microns or larger in size and 95 to 99 percent of particles in the 1 to 3 micron size range.
Some cabin air filters also trap odors and are called “combination” filters. These type of filters have an extra layer of activated carbon that reacts with odors and other airborne pollutants to neutralize them before they become objectionable. The filters can even reduce the levels of carbon monoxide and oxides of nitrogen from the exhaust of other vehicles. The levels of these pollutants can be quite high in heavy stop-and-go traffic, and it’s not unusual for the concentration of these pollutants to be several times higher inside a vehicle than outside. Studies have shown that driver reaction times are slower when the driver is being affected by poor air quality.
Cabin air filters also prevent leaves, dirt, bugs and other debris from entering the HVAC (Heat Ventilation and Air Conditioning) system. This prevents the fan and control doors from becoming jammed with debris that could cause fan noise or affect the operation of the heater, air conditioner and defroster. Keeping the HVAC system clean also helps reduce the growth of odor-causing mold and other microbes on the A/C evaporator.
WHEN TO REPLACE
The recommended replacement interval for a cabin air filter depends on the type of filter (pleated paper or a combination filter with activated carbon) and the filter’s exposure to environmental pollutants.
As a general rule, most cabin air filters should be changed every 20,000 to 30,000 miles — or more often depending on the size and capacity of the filter. Some vehicle manufacturers recommend replacing an odor-absorbing cabin air filter every 12,000 to 15,000 miles or once a year to keep the filter working at peak efficiency. Refer to the vehicle owner’s manual for specific service interval recommendations.
If a cabin air filter is neglected and is not changed for a long period of time, it can become clogged with dirt and debris. This will create an air restriction that can reduce airflow and the output of the heater, defroster and/or air conditioner. A complaint of poor heating or cooling, therefore, may be the result of a clogged cabin air filter that is long overdue for replacement.
Most cabin air filters are flat panel filters, but some have unusual shapes so they will fit the HVAC inlet duct. The filter is usually located behind the glove box or at the base of the windshield in the cowl area over the HVAC inlet duct. The exact location can be found in the vehicle owner’s manual or a filter reference guide. On some applications, the filter may be in two sections to make installation easier.
Replacing a cabin air filter is fairly easy on most vehicles once its location has been determined, but on some, the glovebox or console must first be removed.
A related item your customer might want to buy would be an air freshener or some scented aerosol spray to mask smoke, animal odors or other smells. A cabin air filter can remove odors from incoming air but it won’t do anything for odors that may already be inside the vehicle. So if someone has been hauling around a wet dog or delivering pizza, it will take more than a cabin air filter change to get rid of the aromas.
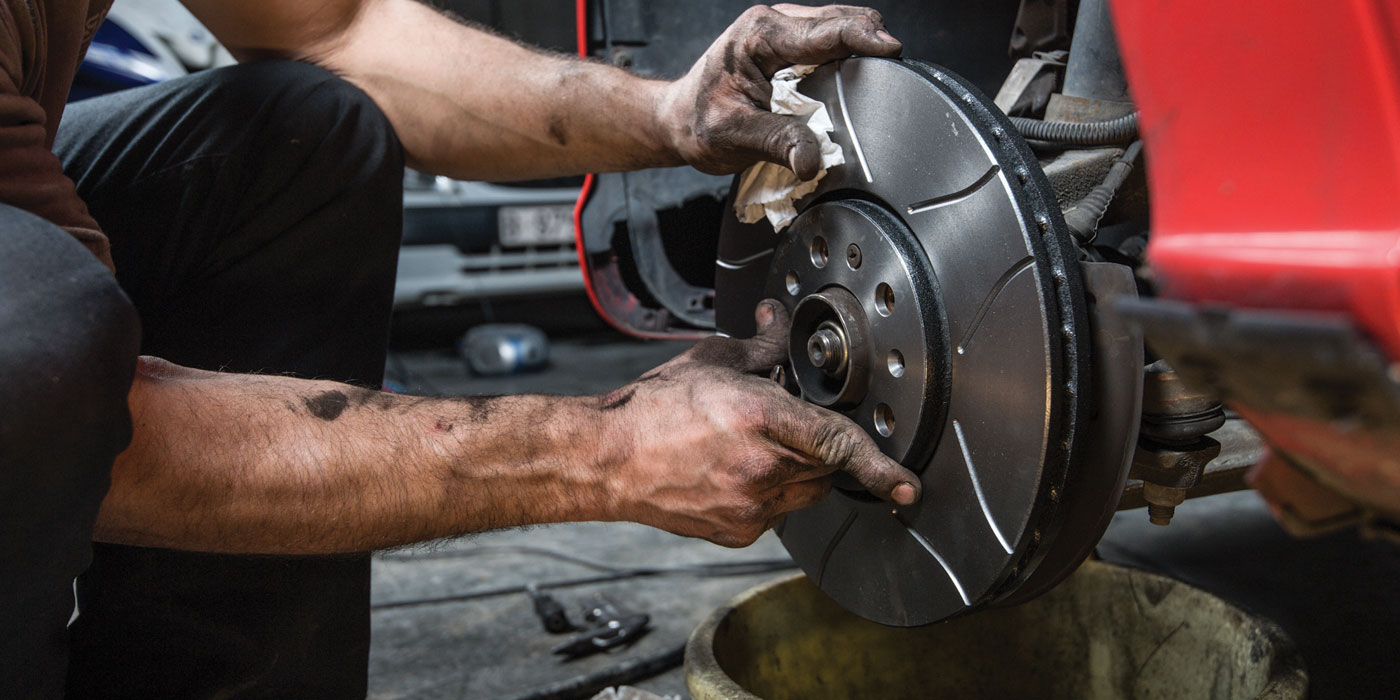
3. CERAMIC AND NAO BRAKE PADS
Friction materials are made from a variety of ingredients. These include various types of fibers for reinforcement and heat management, fillers for friction control and wear resistance, other ingredients to suppress noise and resin to bind all of the other ingredients together. Up to 20 different ingredients may be used to achieve the optimum balance between the material’s friction coefficients, stopping power, pedal feel, wear resistance and noise characteristics. As a result, many brake pads and shoes are marketed according to the ingredients they contain. These include nonasbestos organic (NAO), ceramic, low-metallic and semi-metallic.
NAO LININGS
When the use of asbestos was discontinued in the U.S. because of concerns over possible health risks of asbestos dust, NAO friction materials were developed to replace asbestos. NAO materials contain kevlar and other kinds of fibers and generally provide good braking performance and quiet operation (no brake squeal). NAO is typically used for both “standard” and “economy” grade replacement linings and for rear linings on most drum brakes, as well as the pads on front disc brakes in many cars and trucks.
NAO linings are often dark gray or black. The “softer” nature of NAO linings helps dampen vibrations that can cause noise. But a softer lining usually lacks the wear resistance of harder materials. Because of this, NAO linings tend to wear faster, especially at high brake temperatures. They also give off black brake dust as they wear. The dust can stick to alloy wheels, giving them a dirty appearance. NAO friction materials work well at ordinary brake temperatures, but are more likely to suffer heat fade when the brakes get really hot. Consequently, NAO pads that are fine for everyday driving are not the best choice for performance cars, heavier vehicles (large SUVs and pickup trucks) or “severe use” applications such as police, taxi and emergency vehicles.
CERAMIC LININGS
Friction materials that contain ceramic (silica-based) fibers or particles are usually referred to as “ceramic” linings. Ceramic brake pads were first used as original equipment on a few import cars back in 1980s. Today, nearly 75 percent of all new vehicles come factory equipped with some type of ceramic linings. This has created a growing demand for ceramic replacement linings in the aftermarket, which brake suppliers have responded to by introducing their own ceramic product lines.
Ceramic fibers are a good choice for brake linings because they have stable and predictable friction characteristics. The coefficient of friction doesn’t drop off as quickly as semi-metallics, nor does it fade as quickly as NAO as the brakes heat up. This is called “Mu Variability.” The more stable the friction characteristics are, the more consistent the brake pedal feels whether the brakes are hot or cold.
There is no standard industry definition for what constitutes a ceramic friction material, so the actual ceramic content can vary a great deal from one brand of ceramic friction linings to another. The ceramic content may vary from double-digit percentages to less than a few percent. The size of the fibers or particles may also range from 0.4 to as much as 80 microns in diameter (smaller is better say some suppliers, but others disagree).
Like any friction product, the real-world performance will vary according to the brand, formulation and application. As a rule, ceramic linings are marketed as premium grade linings that provide better braking performance, longer life and quiet operation. The lighter color of the ceramic friction material also produces less visible brake dust, so alloy wheels stay cleaner longer.
Most brake experts recommend replacing linings with same linings as before (or better, in the case of NAO). On vehicles that are originally equipped with ceramic linings, ceramic replacement linings should be installed. On vehicles that were originally equipped with NAO linings, ceramic linings can be used as an upgrade. But ceramic linings are usually not recommended as a replacement for semi-metallic brake pads in larger, heavier vehicles.
The type of brake pads that are installed on a vehicle also affect how long the rotors last. Rotors often have to be resurfaced or replaced because of excessive grooving, heat cracking, uneven wear, runout and warpage. Resurfacing can clean up minor surface imperfections, but every cut that’s taken reduces the thickness of the rotor and brings it closer to discard thickness. But if the rotors are badly worn, replacement is the only option.
Ceramic brake pads are marketed as being “rotor friendly” because they reduce rotor wear. Consequently, rotors last longer and may not have to be resurfaced or replaced when the pads are changed — that can add up to significant savings over the life of a vehicle.
Many ceramic pads also have other special features that help reduce vibrations and noise. These include chamfers, slots and insulator shims.
Chamfers are angled or beveled edges on the leading and trailing ends of the pad that reduce “tip-in” noise when the brakes are first applied. Chamfers also reduce the surface area of the brakes slightly, which increases the clamping force applied by the pads against the rotors. This further helps to dampen sound-producing vibrations.
Slots are grooves cut vertically, diagonally or horizontally in the pads to reduce noise by changing the frequency of vibration from an audible level to a higher, inaudible frequency beyond the range of the human ear. Slots also help reduce brake fade by providing a path for water, dust and/or gas to escape.
Insulator shims provide a dampening layer to absorb and dissipate vibrations before they can cause noise. Some shims are installed on the backs of the pads, while others are molded into the pads themselves, or laminated onto the backs of the pads.
Other products a customer may need when replacing brake linings include brake grease for the backs of the pads, caliper mounts and shoe pads, new brake hardware for drum brakes and brake fluid.
4. FUEL PUMP
The fuel pump is the heart of the fuel system. On most late-model vehicles, an electric pump is mounted inside the fuel tank to supply fuel to the fuel injectors. The pump runs continuously after the key is turned on and the engine starts — unless something goes wrong with the pump and it quits. A fuel pump failure causes the engine to stall and will prevent it from restarting.
Back in the days when engines had carburetors, replacing a fuel pump was not a big deal nor a major expense. The pump was mounted on the side of the engine and usually sold for $20 or less. Diagnosis was relatively simple, too. If it leaked or failed to pump fuel to the carburetor, it was bad.
With electric fuel pumps, it’s a different story. The pumps typically cost $150 to $300. The in-tank location also makes them difficult and expensive to replace. Labor alone can add a couple hundred dollars to the repair bill. Diagnosis can also be a challenge, even for experienced technicians.
For a fuel-injected engine to run properly, the fuel pump must be capable of generating pressure that meets the system’s operating requirements. Close enough is not good enough. The pressure delivered by the pump must meet specifications because that’s the way the engine is calibrated to run. If fuel pressure is even a couple pounds less than the specifications, it can cause problems. A weak pump that isn’t delivering adequate pressure can cause an engine to run lean, misfire and hesitate when accelerating.
The volume of fuel is just as important as pressure. A good fuel pump is usually capable of pumping at least 750 ml (3/4 quart) of fuel in 30 seconds. If it can’t, there’s a problem. The pump might be getting wear, a clogged fuel filter might be restricting fuel flow to the engine, or the pump might not be getting enough volts through its power circuit to run at normal speed. Loose or corroded wiring connections in the pump circuit, a bad relay or low system voltage can all affect the operation of the fuel pump.
Low fuel pressure can be caused by any of these factors, as well as a bad fuel pressure regulator. The regulator is a small valve with a spring-loaded diaphragm inside. The regulator’s job is to control fuel pressure to the injectors.
On most applications, the regulator is mounted on the engine’s fuel injector supply rail. But on engines with “returnless” fuel injection systems, the regulator is located in or on the fuel tank near the fuel pump. On the engine-mounted applications, the regulator has a vacuum line connection to the intake manifold. At idle, high vacuum in the intake manifold causes the regulator to bleed off fuel pressure and route the excess fuel back to the tank through a return line. As engine load increases and vacuum drops, the regulator bleed off less pressure to maintain the same relative pressure differential between the injectors and intake manifold.
If the regulator leaks internally, it may bleed off too much pressure, causing symptoms that mimic a bad fuel pump. Consequently, if the operation of the regulator isn’t checked, someone may replace the fuel pump unnecessarily. The regulator can be checked by pinching off or disconnecting the vacuum hose. This should cause an increase in fuel pressure. If fuel pressure is low, and pinching off the return line causes it to rise to normal levels, the regulator is leaking and should be replaced.
All too often, these “other” causes are overlooked and the fuel pump is replaced unnecessarily. When the new pump fails to perform any better than the old one, your customer may want to exchange the “defective” pump he just bought for another pump, or he may want to return it for a refund. Either way, it creates extra work for you, extra work (and cost) for your pump supplier (who has to warranty the returned pump) and extra work for the installer who has to change the pump a second or third time.
Misdiagnosis is a major issue with electric fuel pumps and costs everybody time and money. Unfortunately, to date there has been no easy way to bench test an electric fuel pump. Pump pressure can be tested on a vehicle by connecting a fuel pressure gauge to the fuel rail service connection or the fuel rail supply line. Fuel volume can be measured by disconnecting the supply line to see how much fuel the pump can delivery in 30 seconds, or by measuring fuel flow with a special flow meter.
Bench testing a fuel pump is a great way to verify its condition and can eliminate comebacks and unnecessary warranty returns. But until recently, there has been no way to safely bench test an electric fuel pump in a store. At least one aftermarket tool supplier is currently developing a fuel pump bench tester that should be available this fall. Several fuel pump manufacturers have also developed bench testing equipment that may be made available to jobber stores soon. When this equipment becomes available, it should be used to test every old pump, and to verify the operation of every new pump before it goes out the door.
WHY GOOD PUMPS GO BAD
A fuel pump is engineered to last the life of a vehicle, but it often fails to go the distance because of other factors. Dirt or rust inside a fuel tank can ruin a pump very quickly (which is why the fuel tank should always be inspected and cleaned or replaced if any contaminants are found inside when replacing a fuel pump).
Many motorists also have a bad habit of driving around with a low fuel level in their tank (under 1/4 tank). This can shorten the life of the pump and cause it to fail prematurely because the pump relies on the fuel for cooling and lubrication. Fuel tanks have internal baffles that are supposed to minimize fuel sloshing. Even so, whipping around a sharp corner, or braking or accelerating hard can sometimes starve the pump for fuel. And when the pump sucks air, it suffers the consequences.
As a fuel pump ages and its brushes wear, the pump may pull more amps than normal thorough its power supply circuit. This may cause the pump wires to run hot and melt or short out! If the damaged wiring harness is not replaced when the pump is changed, the replacement pump may not work at all or may not spin fast enough to generate normal pressure.
The fuel pump is part of the fuel tank sending unit assembly. The pump can be replaced separately (which costs less but requires more work and increases the risk of misassembly), or it can be replaced as a complete assembly (much easier but costs more).
Note: Some replacement pumps may not look exactly the same as the original. The reason for this is that some aftermarket pump suppliers have replaced “old technology” pumps with newer “turbine” style pumps that are more efficient and reliable.
The fuel strainer sock on the fuel pump inlet inside the tank should always be replaced with a new one when changing a pump. Also, if the old fuel tank is rusty, it should be replaced to prevent a repeat pump failure. The fuel filter should also be replaced.
5. HEAVY DUTY BATTERIES
Batteries store electric power for starting the engine, operating the truck’s lights and electrical accessories and for keeping the memories alive in the truck’s on-board control modules when the engine is not running.
All automotive and truck batteries (except the auxiliary batteries in hybrid vehicles) are lead-acid batteries that generate 12 volts D.C. (direct current). Most cars have only a single battery, but many diesel-powered light trucks have two, and big heavy-duty commercial trucks may have three or four. Truck batteries are built to more rugged standards than car batteries. This reduces the risk of vibration damage that could cause premature battery failure in over-the-road trucks that travel hundreds of thousands of miles a year.
Batteries have two posts: one for negative and one for positive. All trucks today have a negative ground electrical system with the negative battery post connected to the truck frame. Care must be used when connecting, charging or jump starting a battery because reversing the post connections can damage the battery and electrical system.
BATTERY OPERATION
To function normally, a 12 volt lead-acid battery must be kept at or near full charge. The alternator maintains battery charge when the engine is running and also provides additional current to meet the truck’s other electrical needs. When the engine is not running, any lights or other electrical accessories in the cab or sleeper that are on will pull power directly from the batteries, causing them to slowly discharge and run down. If the batteries are low, they may not have enough reserve power to crank the engine fast enough for reliable starting, especially during cold weather. Batteries that are dead won’t crank the engine at all.
Batteries have a limited service life that depends on usage, temperature and operating conditions. With over-the-road trucks, battery life is typically three to four years. But in hot climates, battery life may be as short as two to three years. High temperatures increases evaporation of the water-acid solution (called the “electrolyte”) inside the battery.
Since water lost through evaporation in batteries with sealed tops cannot be replaced, the water level inside eventually drops below the tops of the cell plates, causing them to dry out. When this happens, the plates lose their ability to hold a charge and the battery’s storage capacity is reduced. Over-charging the battery can also cause increase water loss and damage the battery. Vibration and shock damage can also damage the cells and connections inside a battery, causing it to fail suddenly.
BATTERY TESTING
The batteries and charging system in a truck should always be tested if any of the batteries are low or weak. Testing will reveal battery condition as well as any problems with the charging system. As a rule, a good charging system should produce a charging voltage about 1.5 to 2.0 volts higher than battery voltage (about 13.5 to 14.2 volts on most trucks with the engine idling). This will vary by temperature and charge.
BATTERY RATINGS
• Cold Cranking Amps (CCA) – The number of amps the battery can deliver for 30 seconds at 0 degrees F while maintaining post voltage of 7.2 volts. For reliable cold weather starting, most trucks require 700 to 750 cold cranking amps. Larger displacement engines may require more cold cranking amps.
• Cranking Amps (CA) – Same as CCA except it is measured at 32 degrees F.
• Reserve Capacity (RC) – The battery’s staying power, as measured by how many minutes the battery will deliver 25 amps and still maintain a post voltage of 10.5 volts. The recommended RC for most truck batteries is 180 to 190 amps.
• Amp Hour Rating (A/H) – This measures low current draw for 20 hours while maintaining a minimum post voltage of 10.5 volts at 70 degrees F.
BATTERY REPLACEMENT
Disconnecting the batteries will cause the radio, engine computer and other modules to forget certain settings. If a battery charger or auxiliary power source (such as a 9-volt “memory saver”) is not connected to the electrical system before the batteries are disconnected, a scan tool or other special procedure may be required to reset the affected module(s).
Replacement batteries must be a compatible “group size” so it will fit the battery tray and holddowns. Group 31 fits most Kenworth, Mack, Peterbilt and Western Star trucks. Also, the batteries must have the same or better CCA capacity as the original.
Most batteries are “dry charged” (pre-charged) at the factory for maximum shelf life. Even so, all batteries should be put a charger to bring them up to full charge before the are installed in the vehicle. This will reduce the risk of overworking the alternator should one or more batteries below.
Finally, batteries contain lead, which is a hazardous metal. Old batteries should be recycled to keep lead out of the environment.
6. LIGHTING
Nothing lasts forever and headlights and other bulbs are no exception. After 1,000 or more hours of operation, the light-emitting tungsten filament eventually burns out, causing the lamp to fail. Vibration is another factor that can shorten the life of any bulb and headlights are always vulnerable to stones and debris kicked up by other vehicles, not to mention collision damage.
The loss of a headlight makes nighttime driving hazardous and may even attract the unwanted attention of the local police. A burned-out taillight, stoplight or turn indicator lamp creates a hazard for other motorists because these lamps signal a vehicle’s directional intentions to other drivers. Bulbs that provide illumination for instrumentation are also important because they allow the driver to monitor the speedometer and other gauges. Even something as simple as a failed trunk light or dome light can create an inconvenience when operating a vehicle after dark. So your