Although it takes a little detective work to discover why a pad fails to meet performance
expectations, it’s worth pursuing in terms of future customer satisfaction and safety.
Because good brakes are a very important part of vehicle safety, those of us in the automotive service and parts distribution industries take it very seriously when we are confronted with a performance complaint or warranty claim on something as “easy” to install as a set of new brake pads. Unfortunately, brake pads are most often returned because they lack pedal sensitivity, stopping power, resistance to dusting, excessive noise or vibration, or resistance to wear. In any case, it’s important to determine if the complaint is caused by incorrect installation or an incorrect application of the friction material itself.
Although it takes a little detective work to discover why a pad fails to meet performance expectations, it’s worth pursuing in terms of future customer satisfaction and safety. According to my experiences, most brake performance complaints can be traced to the six basic installation errors listed below. So, with the idea of brake pads possibly being not so easy to install, let’s discuss the do’s and don’ts of brake pad installation.
ERROR No. 1:
BUYER’S EXPECTATIONS
Most potential performance complaints are caused by selling brake pads that don’t meet original equipment (OE) standards or meet the demands of the specific application. To illustrate, if your cataloging indicates that the OE pads were ceramic, then the replacement pads should also be ceramic. If the vehicle is a truck used for heavy-duty towing, then your brake friction manufacturer might have designed a special semi-metallic pad to meet those very conditions.
Unfortunately, we’ve learned to sell pads as “good, better, best,” which ignores the issues of pedal sensitivity, stopping power, resistance to dusting, wear characteristics and noise, all of which create the most performance and warranty complaints. Speaking of the professional market, the price difference between “good, better, best” pales in contrast to the labor charged by most shops to install the brake pads in the first place. In most cases, there’s only a few percentage points difference among the three and, compared to the comeback complaints that “good” might generate over “best,” “best” wins every time.
While “best” might be a tougher sell for the DIY market, it’s always important to ask the customer his expectations for the brake pad he’s thinking of buying. If the buyer purchases a brake pad that likely won’t meet his expectations, he might also return in the near future with a valid performance complaint.
For the most part, OE requirements or “best” requirements will be met only in the best grades of ceramic and semi-metallic friction materials. The “good” pads are usually organic materials that are more suited to ‘70s and ‘80s-model vehicles than to modern vehicles equipped with anti-locking braking and vehicle stability control systems. If the brake pad doesn’t meet your supplier’s recommendations for each specific application, it’s not going to meet customer expectations in the areas of pedal sensitivity, stopping power, resistance to dusting, wear characteristics and noise.
ERROR No. 2:
THE PAD SLAP
The most common cause of noise complaints occur when a mechanic does a “pad slap,” which means that he replaces the brake pad without spending the additional time to replace the shims, anti-rattle clips and silicone rubber insulation parts needed to dampen noise. To help counter this particular error, most premium pad sets have shims permanently attached to their backing plates and most also include the caliper hardware and lubricant needed to help dampen unwanted noise and vibration. Many price-competitive pad sets, on the other hand, don’t include these features and additional hardware, so they’re more likely to suffer from noise and rattle complaints.
Next, many technicians short-cut the time required for a brake pad installation by not inspecting the brake caliper boot for tears and not lubricating the brake caliper guides before assembly with an approved synthetic, waterproof caliper lubricant. A torn or perforated caliper piston boot allows moisture to corrode the brake caliper bore. In turn, this corrosion causes a failure of the brake caliper piston to fully retract when the brake pedal is released. Sticking caliper pistons cause pad glazing, excess pad wear, and pulling brakes. Many brake pad performance complaints can be prevented by simply taking an extra 30 minutes to inspect, clean and lubricate the brake calipers, and install the new mounting hardware.
ERROR No. 3:
IGNORING THE ROTORS
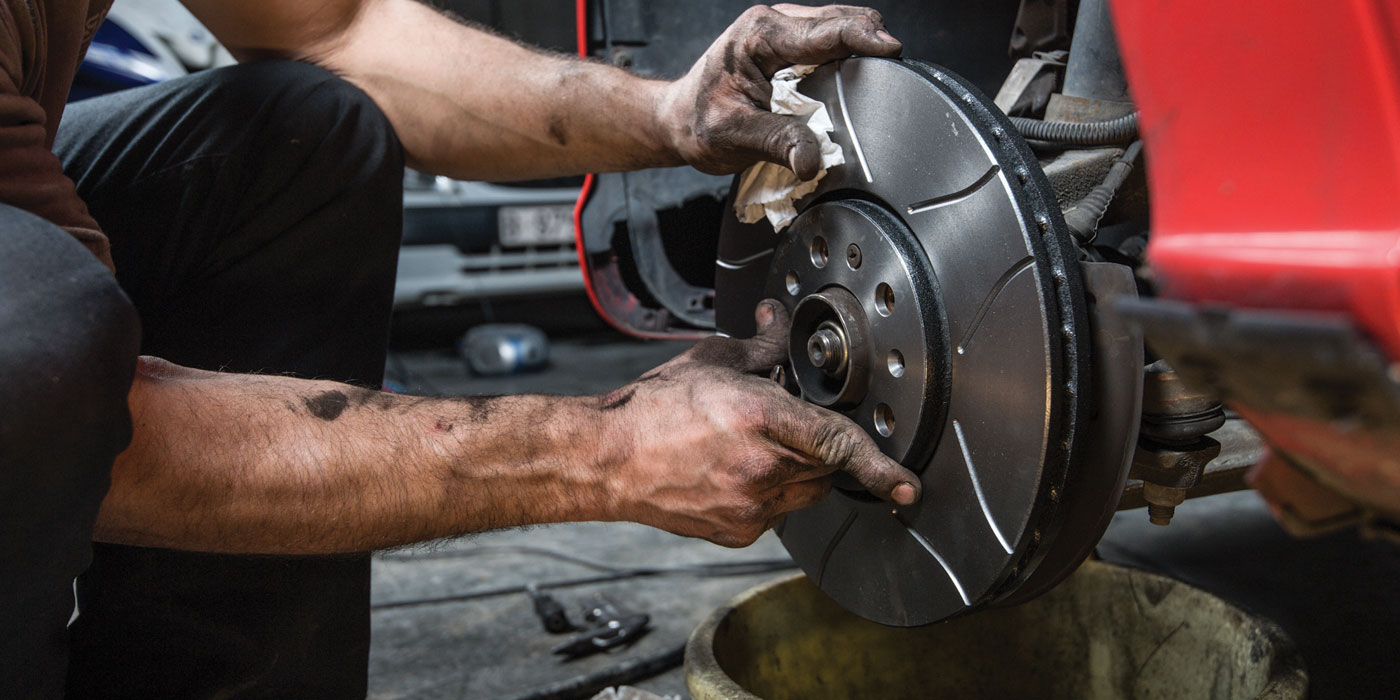
Because modern brake rotors incorporate little excess stock for resurfacing, many amateur and professional installers ignore them during a pad replacement. That oversight is often reinforced by some auto manufacturers recommending that their brake rotors not be resurfaced unless the rotor no longer meets maximum runout or minimum discard thickness specifications. That recommendation is controversial because many shop owners experience a very high percentage of comeback complaints when the rotors aren’t resurfaced or replaced. In general, the friction surfaces of most brake rotors wear in a corrugated fashion and most tend to wear at their outer edges than toward the hub, which makes the rotor taper from center to circumference. Neither surface is suitable for good contact between pad and rotor.
Some rotors also develop a mechanical wobble or runout due to the lug nuts being incorrectly tightened or from friction material being transferred from the pad to the rotor surface. Whatever the case, many reputable shops reduce comebacks to the minimum by recommending that the rotors be resurfaced or replaced during a brake friction replacement.
ERROR No. 4:
INCORRECT RESURFACING
Although it’s nearly impossible to resurface rotors as smoothly as brand-new, it’s a goal that all should strive to achieve. First and foremost, the brake lathe and mounting equipment should be in good condition and the cutting bits sharp. Anything less might produce defects that result in a comeback complaint. It’s important to clean all the mounting attachments and the hub surface of hat-style rotors before the rotor is mounted. Next, it’s important to score the rotor and then turn it a half-turn on the arbor to see if the runout is duplicated on the next scoring cut. If the score cut can be duplicated, the rotor is mounted correctly.
Always use the finest feed and the lightest cutting depth for the final cut. When finished, sand the rotor surfaces with 120-grit sand paper or equivalent buffing equipment in a swirling or non-directional manner to remove torn metal and chips from the rotor surface. Next, the rotor should be scrubbed with soap, water and brush to remove all metallic dust. Last, measure the rotor’s machined thickness to ensure that it exceeds the manufacturer’s discard specification.
ERROR No. 5:
NOT FLUSHING BRAKE HYDRAULICS
DOT 3 and DOT 4 brake fluid is hygroscopic, which means that it absorbs atmospheric humidity. Regular brake fluid is so hygroscopic that it can actually draw moisture through a brake hose into the hydraulic system. Once inside the brake system, moisture corrodes steel brake lines, seizes anti-lock braking system (ABS) valves and erodes the finely machined interior surfaces of brake calipers and wheel cylinders. But even worse, badly deteriorated brake fluid contains enough moisture to cause it to boil under severe braking conditions. Deteriorated brake fluid also contains enough air to make the brake pedal feel spongy or lack pedal sensitivity. For all of the above reasons, old brake fluid should be flushed out of the system when the brake pads are replaced.
ERROR No. 6:
NOT SEATING THE PADS CORRECTLY
Because the brake pad to rotor friction is relatively rough on new brake pad installations, the pad and rotor must be smoothed by gently applying the brake at least a half-dozen times to slow the vehicle from moderate speeds. The main objective of a test drive is to gently seat the pad to the rotor. The secondary objective is to achieve enough swept area to prevent the pad or rotor from developing hot spots during a panic stop. When pads are correctly seated to the rotor, the brake will perform with much less likelihood of ruining an otherwise perfectly executed brake job.