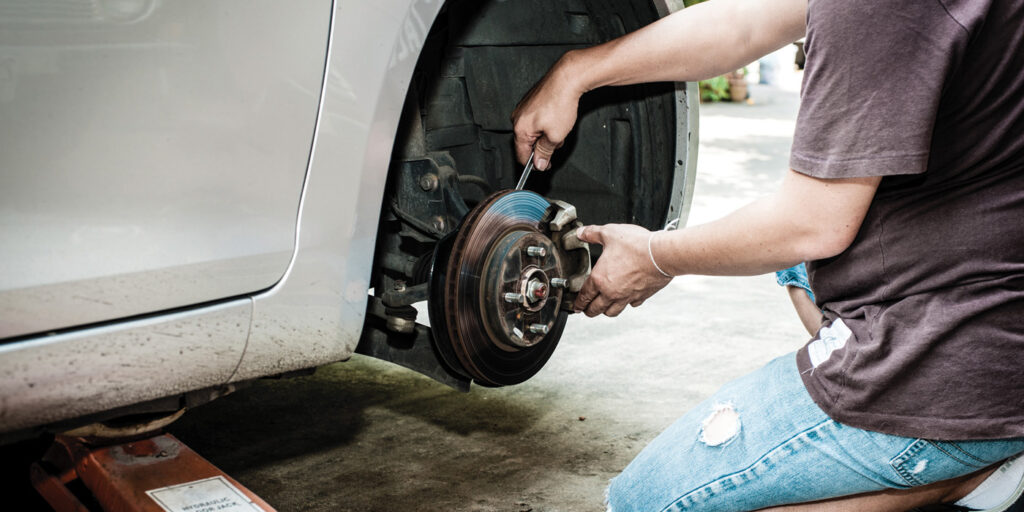
As a technician, the most common after-hours call I get is from friends or relatives who are doing their own brake work. Inevitably, they run into trouble and have gone from no real problem to no brakes at all in the course of an evening.
I can’t come down on DIYers for getting it wrong, because I’ve seen a lot of professional technicians who don’t do a good job at it either. But truth be told, it’s not that difficult if you have everything you need before you get started. The parts and the tools are half the battle, but the knowledge of what to do and how to do it is the other half. For this article, we’ll just tackle disc brakes, and leave drums for another time.
First, let’s look at some of the ways that DIYers are at an immediate disadvantage when it comes to tools, equipment, supplies and time — and how they can use your professional help.
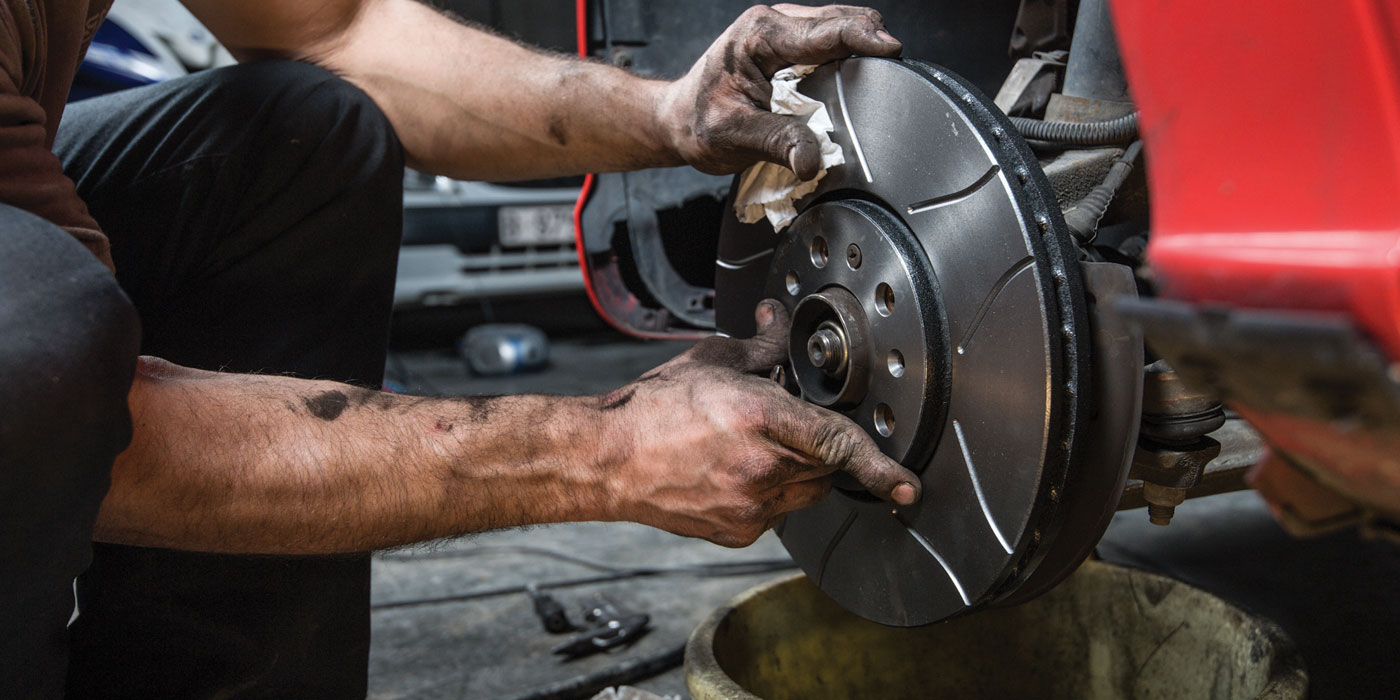
No professional technician can accurately diagnose what’s needed for brake work until they disassemble the vehicle for inspection. Sure, it’s often easy to just look at the brakes and make an initial assessment. For example, if the pads are worn down to the metal and grinding away at the rotors, we know it needs pads and rotors at a minimum.
But, there still are a lot of questions, regardless of what you can see. Are the calipers OK? Are the hoses OK? What about the caliper slide pins and boots? Can the rotors be turned? What about the condition of the brake fluid? Are the pad carriers (caliper brackets) worn out? All of these questions can be answered only through disassembly and inspection.
The inspection leaves DIYers at a disadvantage because what if it’s their only car, or what if they’re trying to do this after work? If they tear something apart to inspect and then they need to get parts, if they don’t have another car at their disposal, it’s either walk, ride a bike or put it back together and drive to the parts store. Nobody – technician or DIYer – likes to double their work, so they want to get all the parts they need first, and then tackle the job.
Tools and equipment leave them at a disadvantage because it’s safe to say they don’t have a brake lathe, a caliper-piston tool or any type of suction device to remove brake fluid from the master cylinder either.
As a parts professional, this is where the fun begins. You have to dig into what they’re doing so you can get them the parts and tools they need before they start the job. At a minimum, if you prepare them for any potential issues, they at least will know what they may be facing and have a plan in place so they’re not high and dry should a problem arise. Plus, if they don’t get what you recommend – and find out later that they need it – they can’t blame you.
Recommend New Rotors
What plays to your advantage is that turning rotors is uncommon, even for shops that have a lathe. There are many factors involved that affect how long a rotor may last or if it can be turned, including the type of pads, the type of rotor, how the owner maintains the vehicle, driver-braking habits and the climate the vehicle lives in.
Still, most of the time, the rotors are too thin or too rusty to resurface. And, for the uncommon ones that you can, the cost of labor for a DIYer to have it done or a shop to do it on a customer vehicle outweighs the cost of a new one.
For these reasons, it’s a good and honest practice to recommend pads and rotors every time. The exception would be some trucks and vans that have excessively expensive rotors, and most of these are usually solid enough to be turned. Of course, you’ll have a number of DIYers who will want to “pad-slap” the car, but the pads will never break in or wear right in those situations.
In addition to pads and rotors, hardware and caliper slide-pin service kits always should be recommended. Some pads come with the hardware (anti-squeal shims, clips, etc.), but if not, you should sell them a kit.
Slide-pin boots, even when they look OK upon disassembly, ideally should be replaced. They see constant motion and temperature change and even if they’re not torn, they’ll be relaxed in comparison to new and they won’t provide the same tight seal to keep grease in and contaminants out. In short, if you use the old ones, you’re using worn components that may fail and shorten the lifespan of a new brake job.
So, they have pads, rotors, hardware and boots. (Keep in mind fixed calipers won’t have boots; we’re just covering the most common type.) The majority of the time this is all they’ll need, but here’s where you can prepare them for what they may need once they get things torn apart.
Getting Into the Job
Once they’ve unbolted the calipers, the first thing they’ll need to do is draw some brake fluid out of the master cylinder to prevent it from spilling when they push the pistons back into the calipers. An inexpensive suction-bulb works well; it’s a nice tool to keep on the shelf. And no, they shouldn’t use the turkey baster from the kitchen. Brake fluid is highly corrosive and can do immediate damage to painted and other surfaces, so the best rule is avoid spilling.
Next, the pistons must be pushed back into the calipers, but inspect the piston boot first. If it’s torn, the caliper should be replaced. A caliper-piston tool is what should be used, because it will push the piston back evenly, but a lot of people may use a “C” clamp or large channel locks. The goal is to push the piston back evenly into the caliper so you don’t bind it up.
If they don’t have the correct tool and they don’t want to buy one from you, we understand. Money doesn’t grow on trees. Tell them to place an old brake pad on top of the piston before pressing it back in. It will help distribute the force evenly. The piston will go back in slowly, but should require only light pressure. If you really have to force it, it’s time for calipers.
Ideally, you should open the bleeder screw or crack the hose fitting when pushing the piston back. This prevents contaminants from being forced back past the seals in the master cylinder and it’s the best practice, but again, this is reality. Bleeders may not open, and hose ends could be rusty. Technically, should they replace calipers and hoses at that point? Yes, but we have to respect the fact that DIYers are trying to save money. They will usually buy what they need if they really need it, but if you help them perform the job economically, they will respect you for that.
Caliper Brackets
For the majority of disc-brake systems, a caliper bracket (or brake-pad carrier) is bolted to the steering knuckle. The bracket fits over the rotor, and one brake pad rests on each side. The bracket also houses two caliper slide pins, and the boots allow the pins to slide in and out (allowing the caliper to float, so the pads will wear evenly.)
The brake caliper itself bolts to the slide pins. When servicing or replacing the brakes, the caliper should be removed first, then the bracket. Even though the entire assembly can be removed as one and the pads wrestled in and out, it’s not the proper way to do it. You’re not able to properly inspect and prepare the bracket using this method.
The bracket is where the brake pads rest, and also where any anti-rattle clips or shims will reside. Not only is it important to make sure the bracket is completely clean and free of rust buildup (the most common problem,) but it also should be inspected closely for wear. In many cases, the brake pads ride directly on the bracket and often will wear deep grooves in it. This will prevent the pads from sliding freely and the bracket will need to be replaced in this situation, which means it’s time for calipers, since they will come with the bracket.
A tip for doing the job right: Once the caliper bracket is cleaned and any new shims are in place, the pads should slide into place on the bracket very easily. If they don’t, there’s still rust buildup on the bracket. It’s easy to miss. It often takes more than a wire brush to remove it.
The other important aspect of the bracket is the slide pins. They must slide freely in and out or else the brake pads won’t wear and/or release properly. What I see frequently on new/remanufactured calipers that have special coatings or paint is that this coating is dripping or running into the hole for the slide pin and puddling at the bottom.
The result is everything will seem normal when installing the brakes, but when the brake pedal is pressed, the caliper won’t release, and the wheel will be locked solid. As soon as you unbolt the caliper from the slide pins, the brakes release. It’s a dead giveaway. A quick hit with a drill bit will remove the offending coating from the slide-pin hole. The calipers are not defective, as a customer may try to claim. It’s an easy fix.
Pads, rotors, hardware and boot kits are the core parts needed to get the job done. Basic hand tools should be enough to remove the caliper. Special tools are a caliper-piston tool and a suction tool, and you’ve prepared your customer for the possibility of needing calipers.
Brake calipers begin to wear and degrade the moment they’re put into service, and while it’s not uncommon to see them last for 100,000 miles or even longer, the more miles they have and the older they are, the closer they are to failing. It’s not if they will, it’s when. Calipers wear out; it’s a simple fact. So, if someone is really pushing the limits of mileage and time, save them a headache down the road and sell them the calipers now.
Parking Brakes
There are a few extra things that should be in their shopping cart, but before we get to that, rear disc brakes can be a fly in the ointment of a routine DIY brake job. Generally speaking, everything is the same, but the catch is the parking brake. Some parking brakes actually are small drum-brake assemblies, utilizing a small drum machined inside the rotor. What’s nice about these is they are identical to front brakes from a service or repair standpoint.
What’s not so nice is often it can be difficult to remove the rotor because the shoes will hang up on the inside. A good majority of the time – especially since most people rarely use their parking brake – the shoes, hardware and cables are all rusted and seized and need to be replaced. This is great from a parts standpoint, but many people opt not to fix it, and we’ll get into drum brakes at a later date.
The other style of parking brake is incorporated into the caliper, and an internal mechanism forces out and retracts the piston. Until recent years, most of these were cable-operated and the mechanism was mechanical. The only trick to these is that you need yet another special tool to return the piston into the caliper. The pistons must be rotated and pushed in at the same time; without the proper tool, you’ll be there for hours. Other than that, the job is identical to the front, and, in most cases, you can leave the brake cable attached. Only if it prevents you from lifting the caliper off and out of the way do you need to remove it.
More and more will you be seeing and answering questions about electronic parking brakes (EPB). The electronic actuator and mechanism takes the place of the cable and mechanical internals and, honestly, I like them. I think they’re much easier to deal with. But, again, this system puts the DIYer at a disadvantage. In many cases, you need a scan tool to retract the piston and put the caliper into a service mode.
Some manufacturers were nice enough to build the function into the existing on-board vehicle software. You just have to be able to decipher the often-confusing instructions and figure out how to get through multiple menus and mystery functions to make it happen.
Seriously though, if it requires a scan tool, there’s no way around it. Period. Unless a DIYer has a way to borrow one or wants to buy one, they won’t be able to perform the job.
Don’t Forget Fluid
What else does a DIYer need to do a brake job? Fluid, for one. You can’t change brake fluid too often, and most likely it hasn’t been done. What I see most of the time is someone pushing the pistons back in without extracting any fluid from the reservoir. It usually overflows. Then, when they’re done with the brake job and set the pedal, the fluid level is fine.
Recommend against this as strongly as possible. If brake fluid is anything other than transparent with the light gold hue that it has out of the bottle, it’s bad. Dark fluid means it’s contaminated with both moisture and particles from degrading rubber hoses and seals.
Get it out of there! The best thing to do, bleeding or not, is to draw as much as you can out of the master-cylinder reservoir before you push the pistons back in. Then, after the pistons are pushed all the way back, draw any additional fluid out and fill the reservoir with fresh, clean fluid before setting the brake pedal or bleeding.
Brake lubricant? Is it special? You bet. It can handle the heat of brakes, it’s designed to stay in place and not wash away, and it’s designed not to damage any of the rubber seals and components it comes in contact with. Use it on slide pins and anywhere the brake-pad backing plates contact the caliper or caliper bracket.