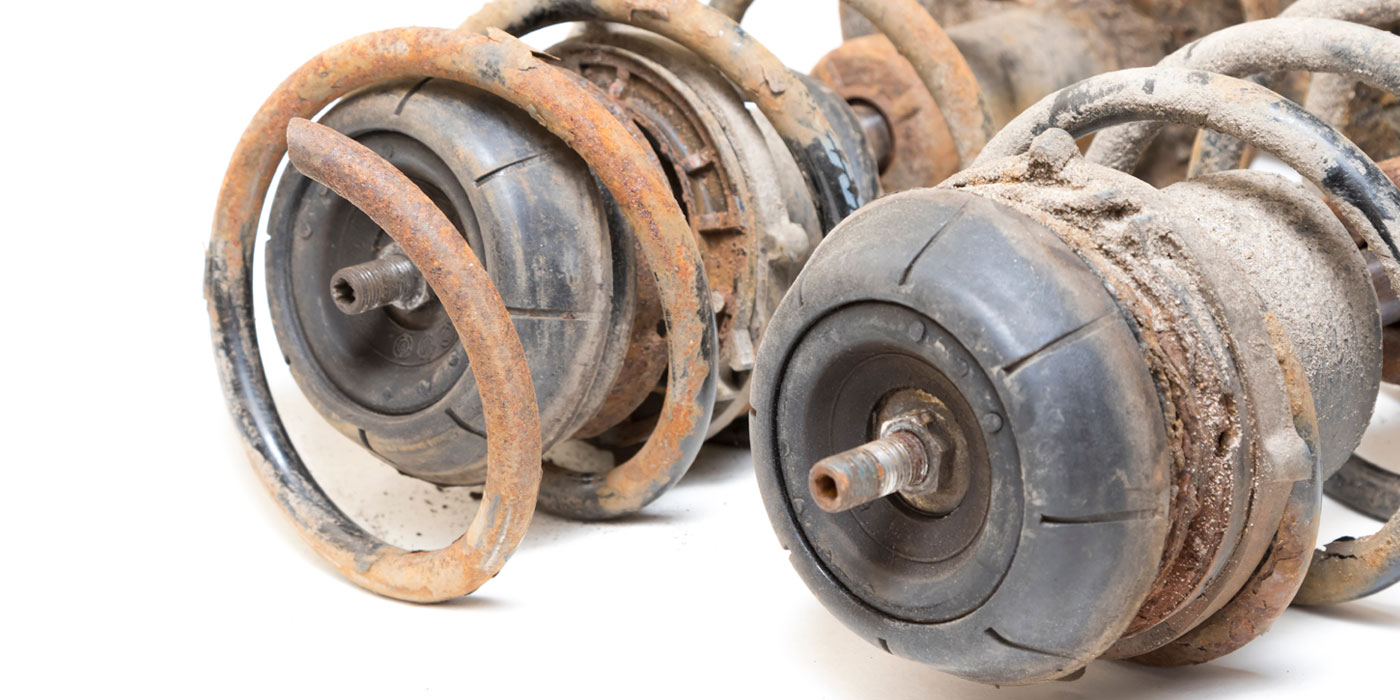
It’s a little known fact that many cars and trucks that end up in junkyards have never had any major steering or suspension parts replaced. They still have the original equipment shocks and struts, springs, ball joints, tie rod ends and steering racks. So does this mean junkyards all across America are full of perfectly good parts? Not these parts.
Most of these parts are worn out and should have been replaced long ago. In fact, many of these vehicles might still be on the road today if their owners had taken better care of them.
Survey after survey finds the same results: Motorists do not maintain their vehicles as well as they should — not just basic maintenance like oil and filter changes, but major repairs that may be needed but are postponed for various reasons. The Car Care Council estimates motorists should be spending $60 billion a year more than they are spending now on auto parts, maintenance and repairs. That’s a lot of underperformed maintenance and repairs.
Worn steering and suspension parts are often overlooked or ignored because they don’t seem to have an immediate impact on driving safety. But nothing could be further from the truth. These parts are all part of the “safety triangle” — brakes, steering and suspension. And just like a three-legged stool, you need all three for safe driving.
If a tie rod fails, the driver has no steering control. That’s not a situation anyone wants to experience while driving their vehicle. If a worn ball joint breaks or pulls apart, the suspension will collapse. That’s another very bad situation to find yourself in.
Even if there are no catastrophic failures, worn steering and suspension parts cause other parts to wear faster — like the tires. A worn tie rod end will cause undesirable changes in wheel alignment that can wear out a set of tires in 10,000 to 20,000 miles or less. That’s why motorists should never ignore symptoms that indicate their vehicle may have worn steering or suspension parts.
SYMPTOMS THAT MAY INDICATE WORN PARTS
Here are some symptoms that may reveal a need to inspect the vehicle for worn or damaged steering or suspension parts that may need to be replaced:
*Uneven or cupped tire wear
*Rapid tire wear
*Tire squeal when turning
*Any looseness or play in the steering
*Steering stiffness or poor return after turning
*The steering wheel is off-center while driving straight
*The steering pulls or leads toward one side while driving
*Steering wander at highway speeds
*Suspension noise when hitting bumps or dips in the road
*Visible suspension sag (front, rear or either side)
*Excessive body sway or instability while driving
*Suspension bottoms out when hitting bumps
*Bouncy ride or wheel hop after hitting a bump
START WITH THE TIRES
Unusual tire wear is a dead giveaway that a vehicle has either an alignment problem or worn or damaged steering or suspension parts. What to look for:
*Toe wear: This produces a feathered wear pattern across both front tires, and sometimes shoulder wear on the inner or outer edge of both tires. Toe wear is usually caused by worn tie rod ends, but may also result from worn or loose inner tie rod sockets on rack and pinion steering gears. Other causes include bent steering arms or misalignment in the rear wheels. If toe wear is accompanied by steering looseness or steering wander, the tie rod ends are probably worn. If toe wear is accompanied by a steering pull or off-center steering, rear wheel toe alignment or axle alignment may be out of specifications.
*Camber wear: This causes uneven wear on one side of a tire that may show up when control arm bushings have collapsed, ball joints are loose, a spindle or strut is bent, or a strut tower is out of its normal position (due to factory misassembly, collision damage, body sag or severe corrosion). A weak or broken spring can also allow camber changes in the suspension that produce camber wear on a tire.
*Cupped wear: This is usually due to worn shocks or struts, or severe wheel and tire imbalance.
STEERING CHECKS
The steering can be inspected one of several ways. With the full weight of the vehicle on the wheels, one person rocks the steering wheel while another looks and feels for play or looseness in the steering linkage and steering column. On some vehicles, this can be done by reaching up and rocking the steering column coupling from underneath while the vehicle is sitting on a drive-on ramp style lift. The dry park method of checking for looseness is generally the best procedure to use because the weight of the vehicle on the wheels creates resistance that makes it easier to see play.
The dry park method is also a good way to find loose upper strut bearing assemblies. While rocking the steering back and forth, watch for strut movement in the strut tower opening. Any wobble would tell you the strut bearing plate is worn and needs to be replaced. Worn upper struts typically make noise when the vehicle hits bumps, and may also make the steering feel stiff and slow to return to the straight ahead position after turning.
As a rule, tie rod ends should show no visible vertical or horizontal play during the dry park check. Any play means these parts need to be replaced.
The inner tie rod sockets on rack and pinion steering gears are enclosed in bellows, making them difficult to inspect. If the bellows are rubber, the inner sockets can be checked by squeezing the bellows and pinching each socket while pushing outward on the wheel (or while a helper rocks the steering wheel). If any movement is felt, the socket is loose and needs to be replaced. On vehicles with hard plastic steering bellows, lock the steering wheel, then check for any in or out movement in the tie rod while pulling and pushing on the wheels.
The rack mounts should also be inspected. Loose, deteriorated or broken mounts may allow the rack housing to move as the wheels are steered. This can cause steering wander and noise.
With reciprocating ball steering systems, you don’t want to see much play or movement in the idler arm. Looseness here can cause steering wander and toe wear. Pitman arms should show no vertical looseness. Center links should be like tie rod ends and show no vertical or horizontal play.
POWER STEERING CHECKS
Unusually high steering effort combined with poor steering return may indicate a weak pump or a worn spool valve in the steering rack. Other causes of increased steering effort can include binding in the steering rack, improper rack yoke adjustment, binding in tie rod ends, ball joints or upper strut bearing assemblies.
Power steering can also be checked with the wheels off the ground. If the wheels want to turn themselves to one side when the engine is running, it indicates a problem in the steering gear control valve.
The fluid level in the power steering pump reservoir also needs to be inspected periodically. A low level usually indicates a leak. A visual check of the pump, hoses and steering gear should reveal the source.
If the fluid is badly discolored (dark brown with a burnt smell), the fluid has been overheated and is oxidized. This can doom the pump and steering gear to premature failure (if they haven’t suffered damage already). Replacing the fluid may buy these parts some time.
Some hissing noise is normal with most power steering systems, but excessive noise may indicate a bad check valve. Belt squeal means the belt is loose and needs to be tightened (if adjustable), or the automatic adjuster is weak and needs to be replaced, or the belt is glazed and needs to be replaced. Pump noise usually indicates wear.
WHEEL BEARINGS
The wheel bearings are also part of the suspension and need to be checked for play. Worn wheel bearings can mimic loose suspension parts and contribute to steering wander and instability.
The wheel bearings can be checked by raising the wheels off the ground and spinning each wheel by hand to check for roughness or noise (there should be none if the bearings are good).
To check wheel bearing play, grasp the wheel at the top and bottom, then try to rock it back and forth by pushing in with one hand while simultaneously pulling outward with the other hand. Alternate back and forth to see if the wheel rocks or moves. There should be no movement if the bearings are good. Refer to specifications for the maximum allowable play.
NEXT, THE BALL JOINTS
If the ball joints on a vehicle have built-in wear indicators, joint play should be checked with the weight of the vehicle on the wheels. Ball joints without built-in wear indicators are generally checked by raising the suspension to take the weight off of the joints. But procedures vary.
On rear-wheel drive applications with SLA suspensions where the spring is on the lower control arm, modified strut suspensions which also have the spring on the lower control arm, and front-wheel drive wishbone strut suspensions where the spring is on the strut but the strut is connected to the lower control arm, the lower ball joints carry the weight and must be unloaded to measure play. This is done by raising the vehicle and supporting the lower control arms to take the weight off the lower ball joints, then pulling on or prying against the wheel (not the ball joint!) to measure vertical and horizontal play in both the lower and upper ball joints. Also, make sure the ball joint is securely attached to the control arm by looking for any signs of movement between the ball joint housing and arm.
If an SLA suspension has the coil spring over the top arm, the upper joints are loaded. To check these joints, the vehicle has to be raised and the upper control arms blocked or supported to unload the upper joints.
With MacPherson struts, the strut supports the load so the lower ball joints are unloaded. To measure play, simply raise the vehicle and allow the suspension to hang free. Then push on or pry against the wheel to measure vertical and horizontal play in the lower ball joints. To check rear ball joints on a FWD car with an independent rear suspension, raising the wheels and supporting the suspension arms will unload the joints.
The amount of horizontal (radial) and vertical (axial) play that is allowed in a ball joint will vary depending on the joint type, location and vehicle application. Always refer to the vehicle manufacturer’s specifications. A dial indicator should be used to accurately measure the amount of play.
CONTROL ARMS, BUSHINGS & SWAY BARS
Front control arms as well as rear trailing arms and lateral links should all be visually inspected for damage or cracks.
The pivot bushings on the control arms should be inspected for obvious damage such as deformation or cracking. Rubber bushings tend to get hard as they age, and may squeak or crack. Bouncing the suspension can help you pinpoint noise.
With sway bars, check the sway bar bushings and mountings. The mountings should be securely attached to the chassis, and the bushings should be in good condition (no cracks, splits, crushing, etc.). Check the end links of the sway bar and their bushings, too, for looseness. If the ends of the sway bar are attached directly to the control arms, check to see that the mounting is secure.
SHOCKS AND STRUTS
A “bounce test” will often reveal shocks that are badly worn, but a more accurate indication of their true condition can be felt while driving the vehicle. If the vehicle sways excessively, rocks, feels bouncy or otherwise lacks proper ride control, the dampers probably need to be replaced to restore like-new handling.
A visual inspection of the shocks and struts should also be made. Look for:
*Physical damage (broken mountings, bent rods, etc.).
*Fluid leakage (which indicates seal failure).
*Loose, collapsed or cracked rubber mounting bushings.
*Physical contact with other suspension components, exhaust pipes or brake lines.
Any of the above conditions would call for repairs or replacement.
DON’T FORGET RIDE HEIGHT
Measuring ride height will tell you if the springs are sagging. Notice we said “measure.” It’s often hard to see small but significant differences in ride height side-to-side, and virtually impossible to tell if a vehicle is within the factory specified ride height dimensions without using some type of measuring device.
Ride height specifications are available in various chassis parts manuals, along with information as to where the measurements are to be made. If ride height is below specifications, the springs are sagging. Spring sag is bad because it changes wheel alignment and increases tire wear. Replacement springs can restore normal ride height, and aftermarket variable rate springs can be installed to add extra load carrying capacity if needed.