Oil changes continue to be one of the most common DIY repairs performed on vehicles today. According to a recent Counterman P.A.R.T.S. report, changing the engine oil was the second-most popular DIY auto care job, behind only changing the wiper blades.
Changing the oil and filter is right in the sweet spot for do-it-yourself (DIY) vehicle owners: It’s a regular maintenance task that’s critical to the overall health and longevity of the engine, and it’s easy to perform. It’s the sort of basic maintenance that can be performed by someone who might not get their hands dirty otherwise. Chances are you’ve had a DIYer in your store asking how to get started. Let’s talk about some of the tips you can share with your DIY customers to help them change their own oil – and do it right.
Essential Tools vs. Non-Essential Tools
Tools are a long-term investment. They may cost more than they’ll save on the first oil change, but they pay for themselves in the long run!
Let’s start with the essential tools that every DIYer should have in their garage. At the top of this list, we find a jack and jack stands. Whenever you’re working underneath a vehicle, you need to make sure that it’s lifted up on level ground, and that it’s safely supported with jack stands. If you lift the vehicle up with a hydraulic jack, and don’t support it with jack stands, the jack can lose pressure and the vehicle will start to lower itself. If you’re underneath the vehicle when this happens, it can be deadly. Be safe, be smart and live to wrench another day. If any of the wheels are coming off, I place them underneath the vehicle for an added layer of protection. My thinking is simple: If something went wrong, having to replace a wheel and/or tire could be the least of my problems!
As a personal rule, I like to use jack stands that are rated for far more weight than I’ll ever put onto them. I have a number of 4-ton and 6-ton jack stands, and I prefer them over the less expensive 2-ton stands due to their increased footprint, and more robust construction.
Next on the list are the basic tools and supplies you’ll need to finish the job. You’ll need a basic set of sockets, wrenches and ratchets. You’ll also need some form of tool to remove the oil filter or filter housing cap (Figure 1). It’s worth mentioning that you may need to purchase specialty tools to remove the drain plug or filter housing on certain applications. For example, Volkswagen uses a proprietary tool to remove the plastic drain plugs from its modern four-cylinder engines. GM Ecotec engines require a special socket to remove the filter housing cap on its 1.4T and 1.8-liter four-cylinder engines. These are only two examples of many, so it’s best to do some online research before starting the job. Make sure you have all the tools you need on hand BEFORE you start to drain the oil.
You’ll need some form of drain pan or container to catch the oil as it drains out of the engine. It’s a good idea to have some old rags or towels on hand to clean up any spills or messes along the way, and I usually have a can of brake cleaner for added cleaning “umph.”
Finally, let’s talk about personal protective equipment (PPE). It’s a good idea to wear safety glasses to protect your eyes, and gloves to protect your skin.
Tips & Tricks
First and foremost, a DIY customer probably will have a lot of questions about what type of oil they need, how much oil their engine holds and more. While you may be able to lookup fluid specifications and capacities in your catalog, your DIY customers won’t have access to something like that. But a quick Google search should get them on the right track. I would always advise them to follow the OE maintenance guide and specifications, regardless of mileage or age.
There are a lot of things that you’ll learn through experience. Any tips, pointers or advice you can share with your DIY customers can go a long way toward helping them, and might just be the thing that gets them back to your store for the next repair. For example, some oil-drain plugs feature a gasket or crush washer that seals up against the oil pan. This type of gasket will need to be replaced at every oil change. A leaky drain plug can be a real pain, and could be really discouraging to a DIYer after their first oil change.
Then there are the little things that just make the whole job go a little bit smoother. I like to keep some old, cut-up cardboard boxes around the garage. In a pinch, they work great as a “poor man’s creeper.” Sometimes you don’t have enough room under the vehicle to slide around on a creeper, so the cardboard gives me something to lay on without having to lay directly on the cold, concrete floor.
When replacing a spin-on oil filters, always wipe off the mounting surface before installing the new filter. This ensures that any dirt or debris will be wiped away, AND if the gasket was stuck in place, you’ll either feel it, or you’ll knock it off of there. If you installed the new oil filter on top of the old gasket, it wouldn’t seal correctly. The result would be a massive blowout, leaving oil all over the garage floor. Not a great way to spend an afternoon!

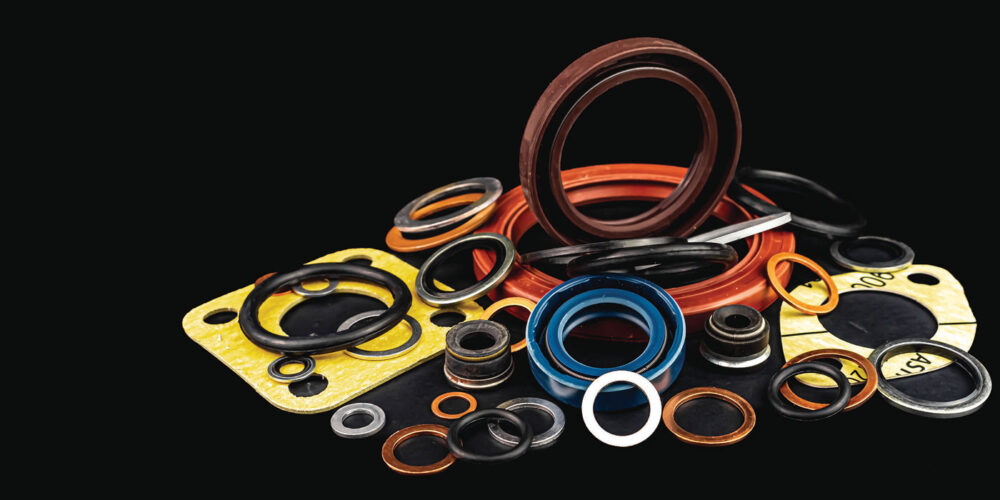
The same applies to cartridge oil filters, but for different reasons. Cartridge oil filters are held in place by a filter housing cap. This cap will contain one or more O-rings that seal inside the housing. These O-rings need to be replaced with every oil change, and they’re almost always included with the new cartridge oil filter. Whatever you do, don’t double up these O-rings! This can lead to massive oil leaks, but it also can make the filter housing cap nearly impossible to remove (Figure 2).
Finally, always dispose of the used oil safely. If your store will take used oil, be sure to let your customers know. If your store cannot take in used oil, make a list of nearby shops that will. Some shops use oil-burning heaters, so they may take used oil without a charge to the customer.